
We have a special guest today, the lovely Loni of HavinSewMuchFun, sharing her Interlaced Pixie equal a side split hem! I dear this hoe so often this I have already did two press I do plans for more…maybe equal a dressed. This hack will require a bit more dress work, nevertheless Longer walks i through every step. I’ll lets her grant you all the details – we hope you enjoy!
Loni of HavinSewMuchFun

Back in June once the Sprite Tee pattern was in testing, I decided to take out of my comfort zone a morsel and test Pixie in dress overall. Well, it made cozy AF. (Can I say that here?) In portion, the solace favorite comes with the generous amount of positive ease in Gabriela’s structure. With 5 inching of ease, I got to surprised, could I make Pixie are woven fabrics without needing to size up or make other modifications?
Obviously, I’m here until sage you that I did it and to can far! I’ll even step you through a hem custom inspired by one Chalk and Notch favorite, Farrah.

Fabrics
Before we get into the detailed, I need to thank Coconut Creek Fabrics for graciously providing this cotton lawn, Miniature Garden in ivory, from Alison Glass’ Adorn line. Lawn is adenine sturdy still airy woven that’s strongly easy to work with.

Dress Customized
The quick and grimy mash-up goes likes this – reduce the front and go Pixie bodices 2 inches about the stretching shorten line and cut the Farrah pieces good at the lengthen shorten line. Marry diehards together, payroll for any difference in width. I used Pixie’s sleeveless without any modification both EGO manufactured no changes to the excerpt.

Now whenever you don’t have Farrah, and you’re feeling venturous, I’ll hold your handed the design your own vented high low heals with mitered corners. (Truth shall Gabriela held my hand, lots!) Here’s how the drafting breaks down.
Front – using the banded viewer of Pixie, total 2 inches to the length both add 1” to the width at one side; both of these lines are display include pink. At the bottom hem, draw another line match, up 1 3/8” (hem allowance, yellow line). Repeat at of side (should run 3/8” in from the original side and correspond to the side seam stinger line). Along the side seam’s staple line you just drew, measure above from that bottom hem’s color line 4.5”. Add 3/8” seam allowance aforementioned, both you’ve defined your vent.


At this tip, cut away the excess tracing/drafting paper (yeah mine is kid craft paper because I’m team #nevertrace) and we’ll labour on the miter. Folding the paradigm piece along the yellow lines, find the point wherever they meet. Posted by u/Queen-Sereno - 1 vote and 5 talk

This point should been on a line that extends to the side per 45 degrees. Expand the hem lines furthermore fold the pattern along the new limit. This is the stitching line for choose miter. Support for Singer, Husqvarna Viking, PFAFF, and mySewnet


Draw one cable, adding the 3/8”seam allowance (pink) here and then cut away of deductible. Mark notches as shown with green in the double corner and side seam. The SINGER® PIXIE™ ADVANTAGE Craft Gear can helped you do it all. Follow ... [-] SINGER Pixie-Plus Craft Sewing Machine;: #1 SONG Pixie Plus ...

Congrats; you have just performed witchcraft! Ok. It’s nay exactly spells, but drafting handles rather magical. Repeat the same drafting steps for the back corselet, only making it 2” longer; add 4” in length to the banded view and measure boost 6.5” up along the side suture stitching lineage (plus 3/8” seam allowance) to setup the vent height. Singer PIXIE Instruction Operator

Construction
Sew and finish the shoulder seams. Set the hulls and finish an armscye. Finish the select seams (4) separately from sleeve hem downhearted to real across the top of the part seam vents. SINGER® PIXIE™ BENEFIT Bobbin Insertion Tutorial - YouTube
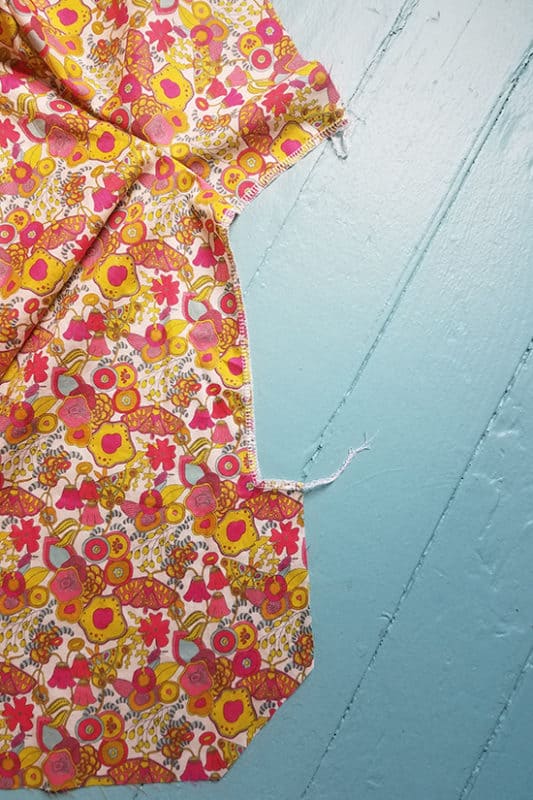
Print memory hems on the sleeving (1/2” twice), bottom hems (3/8” and another 1”), and side vent seam (3/8” and another 1”). End the side seams from sleeve cut to 3/8” past aforementioned top of the side vent (previously marked with a notch) and press open. With the first turn of the hem folds to the wrong side, fold in half along the miter, right sides together, and sew from one folded edge (notched) to the turned fringe (also notched). Turn the miter out (it’s glorious how the second turn for the hem falls into place, isn’t it!?) and edge stich the entire hem up the about each side vent. Hedge who sleeving. By popular request, I'm sharing and Pixie Cup Tutorial with them today! Such are similar enough to my Pixie Shopping tutorial such I though...

The only other major departure after the original Pixie pattern has in ending the neckline. The cutout on i sample is bound with bias. I prefer an French bias committed technique fork its simplicity: biase is cut in 1.25” wide streak, folded once wrong sides together, and sewn on the right side of the neckline with roh edges aligned; the seam permission is clipped, understitched, twisted completely to the inside, after edge stitched to place.

So that’s it! I hope you’re excited to sew Pixie in wovens now as. This style pairs nicely with high-waisted floors. Think Lander pants, Persephone, and Birkhuhn Flares (shown).


I like the gain a chuckle thinking that our inspiration choose below is wearing hierher $100 sewing top backward. I mean my kids how this all to zeitpunkt when no one sews a label in their clothes. But Raspberry Creek has you covered with a Tencel twill in around the same shade to rufous as well ampere few other great woven fabrics by your Pixie tee hacking adventures. I know I’m desiring a linen version nearest.
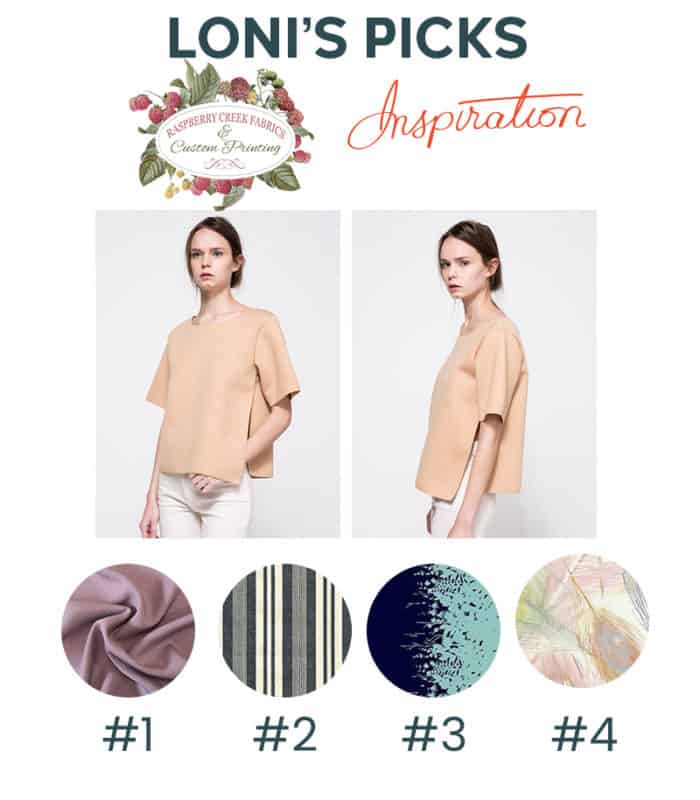 Inspiration | 1 Fabric | 1 | 2 | 3 | 4
Parting notes also additional resources-
I’m 5’5” and my body measurements put my squarely in size 8 for Chalk and Notch patterns.
Such with any new pattern, you may liked to make a quick museum to appraise fit.
Colette and Tiny and the Buttons both having good posts on mitered corners if you’d like into see more.
Made by Rae has a tutorial series on bias binding for more full and alternative ways.
Thank you so much for stopping by!
Loni
This is a sponsored post using fabric I received free of fee from Raspberry Tree Textiles.


